Tag Archives: kernel

Unlocking a LUKS encrypted root partition remotely via SSH

If you are thinking on sending a new server to a remote datacenter for colocation or you have rented one or more servers in the cloud, probably you have thought that you would like to encrypt your server’s hard disk.

The problem is that if you encrypt the whole hard disk (the root partition) you will need some kind of KVM to type the password remotely every time the server is restarted … sure??? No!

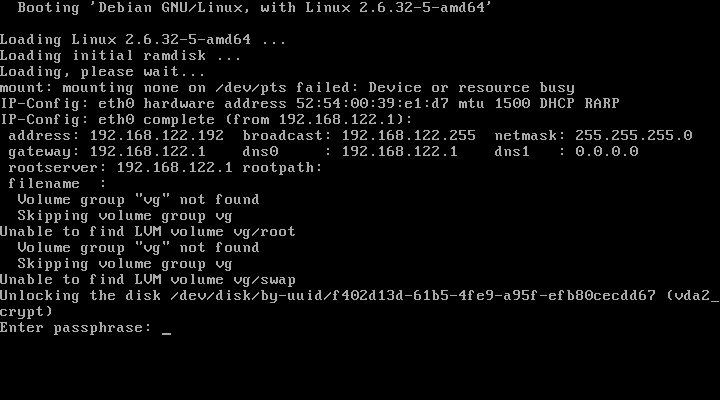
Thanks to this nifty trick, you can enter the password remotely during the boot process. The trick involves embedding a small ssh server (dropbear) in the initramfs that allows you to enter the password remotely for the root partition at boot time.

For those who are lucky enough to use Debian, the procedure is so simple and easy as ::

1) Install your server with the root partition encrypted.

2) Install the required packages:

apt-get install openssh-server dropbear busybox

3) Copy the SSH key that has been generated automatically

scp root@my.server.ip.addr:/etc/initramfs-tools/root/.ssh/id_rsa ~/id_rsa.initramfs

4) If your server gets the IP address automatically (DHCP) ignore this step, otherwise you have to specify the IP configuration at the Kernel boot line. To do this edit the file /etc/default/grub and define the line:

GRUB_CMDLINE_LINUX="ip=<client-ip>:<server-ip>:<gw-ip>:<netmask>:<hostname>:<device>:<autoconf>"

Using the format specified in the file Documentation/nfsroot.txt of the Linux kernel documentation. For example:

GRUB_CMDLINE_LINUX="ip=192.168.122.192::192.168.122.1:255.255.255.0::eth0:none"

Reload the grub configuration

update-grub

5) Reboot

reboot

6) And unlock remotely!

ssh -o "UserKnownHostsFile=~/.ssh/known_hosts.initramfs" \
	-i "~/id_rsa.initramfs" root@my.server.ip.addr \
	"echo -ne \"MyS3cr3tK3y\" >/lib/cryptsetup/passfifo"

And for those not lucky enough to use Debian, and also for those who have such luck, but want more details on this procedure, I am pasting here the archive cryptsetup/README.remote from Debian that I am sure that you will find very useful :)

$ zcat /usr/share/doc/cryptsetup/README.remote.gz

unlocking rootfs via ssh login in initramfs
-------------------------------------------

You can unlock your rootfs on bootup from remote, using ssh to log in to the
booting system while it's running with the initramfs mounted.


Setup
-----

For remote unlocking to work, the following packages have to be installed
before building the initramfs: dropbear busybox

The file /etc/initramfs-tools/initramfs.conf holds the configuration options
used when building the initramfs. It should contain BUSYBOX=y (this is set as
the default when the busybox package is installed) to have busybox installed
into the initramfs, and should not contain DROPBEAR=n, which would disable
installation of dropbear to initramfs. If set to DROPBEAR=y, dropbear will
be installed in any case; if DROPBEAR isn't set at all, then dropbear will only
be installed in case of an existing cryptroot setup.

The host keys used for the initramfs are dropbear_dss_host_key and
dropbear_rsa_host_key, both located in/etc/initramfs-tools/etc/dropbear/.
If they do not exist when the initramfs is compiled, they will be created
automatically. Following are the commands to create them manually:

# dropbearkey -t dss -f /etc/initramfs-tools/etc/dropbear/dropbear_dss_host_key
# dropbearkey -t rsa -f /etc/initramfs-tools/etc/dropbear/dropbear_rsa_host_key

As the initramfs will not be encrypted, publickey authentication is assumed.
The key(s) used for that will be taken from
/etc/initramfs-tools/root/.ssh/authorized_keys.
If this file doesn't exist when the initramfs is compiled, it will be created
and /etc/initramfs-tools/root/.ssh/id_rsa.pub will be added to it.
If the latter file doesn't exist either, it will be generated automatically -
you will find the matching private key which you will later need to log in to
the initramfs under /etc/initramfs-tools/root/.ssh/id_rsa (or id_rsa.dropbear
in case you need it in dropbear format). Following are the commands to do the
respective steps manually:

To create a key (in dropbear format):

# dropbearkey -t rsa -f /etc/initramfs-tools/root/.ssh/id_rsa.dropbear

To convert the key from dropbear format to openssh format:

# /usr/lib/dropbear/dropbearconvert dropbear openssh \
	/etc/initramfs-tools/root/.ssh/id_rsa.dropbear \
	/etc/initramfs-tools/root/.ssh/id_rsa

To extract the public key:

# dropbearkey -y -f /etc/initramfs-tools/root/.ssh/id_rsa.dropbear | \
	grep "^ssh-rsa " > /etc/initramfs-tools/root/.ssh/id_rsa.pub

To add the public key to the authorized_keys file:

# cat /etc/initramfs-tools/root/.ssh/id_rsa.pub >> /etc/initramfs-tools/root/.ssh/authorized_keys

In case you want some interface to get configured using dhcp, setting DEVICE= in
/etc/initramfs-tools/initramfs.conf should be sufficient.  The initramfs should
also honour the ip= kernel parameter.
In case you use grub, you probably might want to set it in /boot/grub/menu.lst,
either in the '# kopt=' line or appended to specific 'kernel' line(s).
The ip= kernel parameter is documented in Documentation/nfsroot.txt in the
kernel source tree.


Issues
------

Don't forget to run update-initramfs when you changed the config to make it
effective!

Collecting enough entropy for the ssh daemon sometimes seems to be an issue.
Startup of the ssh daemon might be delayed until enough entropy has been
retrieved. This is non-blocking for the startup process, so when you are at the
console you won't have to wait for the sshd to complete its startup.


Unlocking procedure
-------------------

To unlock from remote, you could do something like this:

# ssh -o "UserKnownHostsFile=~/.ssh/known_hosts.initramfs" \
	-i "~/id_rsa.initramfs" root@initramfshost.example.com \
	"echo -ne \"secret\" >/lib/cryptsetup/passfifo"

This example assumes that you have an extra known_hosts file 
"~/.ssh/known_hosts.initramfs" which holds the cryptroot system's host-key,
that you have a file "~/id_rsa.initramfs" which holds the authorized-key for
the cryptroot system, that the cryptroot system's name is
"initramfshost.example.com", and that the cryptroot passphrase is "secret"

-- <debian@x.ray.net>, Wed, 30 Sep 2009

OpenRISC: Making the stack 100% free

OpenRISC is the flagship project of the OpenCores community. This project aims to develop a series of general purpose open source RISC CPU architectures.

The OpenRISC 1200 (OR1200) is a synthesizable CPU core that runs on FPGAs from a broad number of vendors, and is currently being used in a number of successful industrial projects. This CPU is an open source implementation (LGPL) of the OpenRISC 1000 RISC architecture.

These days the project has reached an important milestone: they have submitted their patches for review to the Linux kernel mailing list and hopefully they will get it merged, so Linux will officially support the OpenRISC architecture.

This are exciting news!

If you have a FPGA board you can load it with the OpenRISC softcore and execute Linux on it (demo video).

But if you don’t have one, then you can try the nice OpenRISC emulator: its easy and funny.
Here is a link to the detailed howto, and here is my cheat sheet:

sudo apt-get install build-essential libmpc-dev lzop git-core
sudo apt-get build-dep gcc-4.4
mkdir ~/openrisc
cd ~/openrisc
git clone git://openrisc.net/jonas/or1ksim-svn
cd or1ksim-svn
./configure && make && sudo make install
cd ~/openrisc
git clone git://openrisc.net/jonas/toolchain
cd toolchain
git submodule update --init
# go for a coffee
export PATH=~/openrisc/toolchain/bin:$PATH
make PREFIX=~/openrisc/toolchain
cd linux
make ARCH=openrisc defconfig
make CROSS_COMPILE=or32-linux-
# go for a tea
sim -f arch/openrisc/or1ksim.cfg vmlinux

And voila! You are running a 100% free system, from the CPU to the Operating System, including the Wishbone bus :)

# cat /proc/cpuinfo
cpu                     : OpenRISC-18
revision                : 1
dcache size             : 8192 kB
dcache block size       : 16 bytes
icache size             : 8192 kB
icache block size       : 16 bytes
immu                    : 64 entries, 1 ways
dmmu                    : 64 entries, 1 ways
bogomips                : 40.00

As the OpenRISC 1000 is now considered stable, the OpenCores project is trying to build a cost-efficient ASIC with this design to get improved performance. They launched a call for donations in 2011 with the aim to produce the first ASIC in Q1 2012.

I am willing to get one of this!

The open-source methodology is here to stay, just take a look at the success story behind Linux/Android, and all the great benefits that open-source offers. We now need to take the next step with open-source hardware development, meaning to actually create “true” open-source Semiconductor components in order to stay competitive, and to make sure that smaller companies can compete with large Semiconductor giants. So please join us and help us rewrite the history books for hardware development…

Workaround for the time drift issue on Xen: keep your guests synced

Suppose that you want to keep the clock of one or more Xen guests synchronized with a NTP server and the Xen Host has the clock desynchronized. Also to screw things more you don’t has access to the Xen host so you can’t simply fix the clock of the Host. What can you do?

In order to be able to change the clock time of your guest you need to activate the independent_wallclock bit , and then you will be able to sync it.

echo 1 > /proc/sys/xen/independent_wallclock

But if you left this bit enabled soon you will notice some weird problems:

# ping google.es
PING google.es (173.194.37.104) 56(84) bytes of data.
Warning: time of day goes back (-21us), taking countermeasures.
Warning: time of day goes back (-23us), taking countermeasures.
64 bytes from lhr14s02-in-f104.1e100.net (173.194.37.104): icmp_seq=1 ttl=47 time=0.000 ms
Warning: time of day goes back (-21us), taking countermeasures.
64 bytes from lhr14s02-in-f104.1e100.net (173.194.37.104): icmp_seq=2 ttl=47 time=0.000 ms
Warning: time of day goes back (-21us), taking countermeasures.

# date; date; date; date; date
Wed Sep 29 19:04:06 CEST 2010
Wed Sep 29 19:04:05 CEST 2010
Wed Sep 29 19:04:06 CEST 2010
Wed Sep 29 19:04:05 CEST 2010

Amazing huh?? looks like the Xen project is developing in secret the time travel algorithm.

The trick is that you must disable the bit independent_wallclock as soon as you has your clock synchronized and everything will work as expected.

echo 0 > /proc/sys/xen/independent_wallclock

Obviously this issue will prevent you to use a NTP daemon like ntpd / openntpd. So the simplest solution is to deploy a cron job that will sync your clock with ntpdate.

So, here is my cron.daily script to keep in sync the clock of the xen guests:

#! /bin/bash
# This is a DIRTY hack to allow have time settings correctly on Xen guests
# clopez@igalia.com
echo 1 > /proc/sys/xen/independent_wallclock
ntpdate -b pool.ntp.org 0.debian.pool.ntp.org hora.roa.es
echo 0 > /proc/sys/xen/independent_wallclock

If your Xen guest is proxied and don’t has direct access to Internet then you can use htpdate

#! /bin/bash
# This is another DIRTY hack to allow have time settings correctly on proxied Xen guests
# clopez@igalia.com
echo 1 > /proc/sys/xen/independent_wallclock
htpdate -s -P IP.ADDRESS.OF.PROXY:PORT www.linux.org www.google.com www.debian.org www.redhat.com
echo 0 > /proc/sys/xen/independent_wallclock

Hope this help you and you don’t have to waste your time thinking about how to fix the time as I did 😉

CompCache (ramzswap) for MeeGo 1.0

My girlfriend has one of the first netbooks that were launched long ago. It is the Acer Aspire One A110 model that ships with 512MB RAM and an 8 GB SSD disk (an Intel Z-P230). This SSD has been criticized for its slow read and write speed. Intel lists the drive’s maximum speeds as 38 MB/s read and 10 MB/s write. But I can sure that you will not get more than 5MB/s writing.

So imagine, with 512 of RAM and a disc that seems rather an SD card, having any modern operating system running smoothly can be quite painful.

So I decided to give a try to MeeGo on this machine and I liked the user interface and also I was surprised that it is running more smoothly than the previous Ubuntu NBR installation.

This notebook has only 512 RAM so without a swap device you can just open only a little more than the browser and a shell. But trying to put a swap on this disk would be like shooting yourself in the head.

So here is when the great project compcache comes to rescue. Unfortunately the kernel that comes with MeeGo does not include compcache nor is there any package available in the repositories, so if you are looking to enable compcache in MeeGo this is your lucky day.

I have compiled all the necessary bits to run compcache under MeeGo and I packaged it in an rpm file.  This package includes the ramzswap module and the lzo_compress module compiled to match the MeeGo 1.0 kernel (2.6.33.3-11.1-netbook), also it includes the rzscontrol utility and an init script to load the service at startup. You can download it from here and then just install it:

wget http://people.igalia.com/clopez/kmod-compcache-2.6.33.3-11.1.i586.rpm
sudo rpm -ivh kmod-compcache-2.6.33.3-11.1.i586.rpm

I have configured it to use the 75% of the total RAM available on the system for the RAM swap device. I have done different tests and with this configuration I was getting the best of this machine, nevertheless you can change this easily. After installing the package edit the file /etc/init.d/compcache and change the variable ratio=75 at the beginning of the file to what you want and restart the service.